6. Processor
The Processor is a component of the WoTKit that lets you create “Pipes” - visual scripts that take data from one or more input sources, process that data in any way, and output that data to one or more sensors and actuators.
6.1. Creating a Pipe
Click on Pipes and then on New Pipe.
- If you do not have any existing pipes, clicking on Pipes will redirect you to the New Pipe page automatically.
Add modules to the pipe by dragging them from the Modules component and dropping them on the workspace.
- Each module will have an input dot on top and/or an output dot below
To pipe information between modules, drag the output dot of one module to the input dot of another.
6.1.1. Create/Edit Pipe screen components
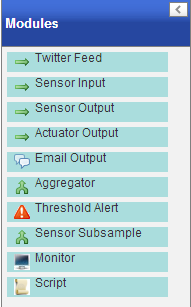
The Pipe Modules
- Menu (on top) - Actions to save, delete, and start or stop the pipe
- Modules (on the left) - Pipe modules that can be dragged and dropped into the workspace
- Workspace (centre) - The modules and their connections are displayed here
- Properties (on the right) - Basic properties of the pipe, such as name and description
- Monitor (on the right) - Custom ‘’Monitor’’ modules in the pipe can be viewed in this component
- Error Monitor (on the right) - WoTKit’s API responses to input/output actions (success or error messages)
- Minimap (on the right) - A minimap of the workspace
- Help (on the right) - A link to this document
6.1.2. Module types
Input:
- Twitter feed - The name of a twitter feed to poll
- Updated every time a new tweet is tweeted by the account
- Fields that will be outputted by this module:
- message - The content of the tweet
- Sensor input - The name or ID of a WoTKit sensor that you have access to (either public, or private and owned by you)
- Updated every time a new datum is posted to the sensor
- Fields that will be outputted by this module:
- value - The value of the datum
- {any other field} - If the sensor has any other fields, they will appear by name here
- Process:
- Aggregator - Aggregates multiple sensors together
- Accepts multiple inputs
- Outputs the input values verbatim whenever an input is updated, and adds a _sensor field with the input sensor’s name
Threshold Alert - TODO
- Sensor Subsample - Will only pass data from input to output at least that many seconds have passed after the last input
- Define the ‘’period’’ in seconds
- Any input sent during the defined period after the last input is suppressed
- Script - A custom Python script
The input and output to/from the script are in the python dictionaries named called input and output
- For example, if you input a sensor to the script and output to another sensor and you want to multiply the value field by 2 and add 1 use the following script:
output['value'] = input['value'] * 2 + 1
Any entry in the output dictionary will be sent as the output of this script
- {named script} - A copy of the template that you defined in the Scripts page
- Note that this creates a copy of the template. Any changes made to this script will not reflect in the original template
- Log:
- Monitor - A debugging module. Will display everything that is sent to it’s input as a table in the Monitor component on this screen
- Output:
Sensor output - Post the input to the named sensor
Actuator output - Post the input to the named actuator
- Email output - Email the input to the provided email address
- To replace text with a value use the following syntax: ${value}